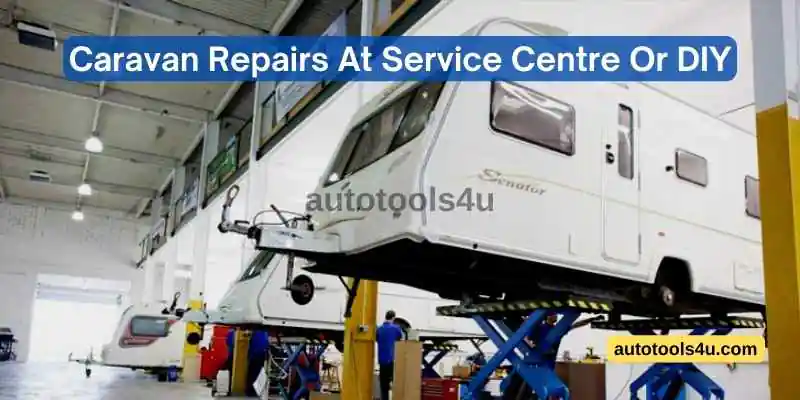
Are you tired of spending a fortune on caravan repairs? Do you wish you could handle these repairs yourself and save both time and money? Well, you’re in luck! DIY caravan repairs are not only possible but can be a fun and rewarding experience. With a little bit of knowledge and some basic tools, you can fix many common issues that arise with your caravan. Not only will you save money on expensive repair bills, but you’ll also have the satisfaction of knowing you did it all yourself. In this article, we’ll guide you through some of the most common caravan repairs and provide you with tips and tricks to make the process as easy as possible.
Why Prepare for Repairs when they haven’t happened?
Every caravan needs to have regular maintenance. Not only to ensure your enjoyment of your vacation but also for safety reasons (gas leaks, brakes, etc.). If you don’t service your caravan annually, something will break down, right? Your vacation is meant for relaxation, not for analyzing everything that went wrong.
Okay, we know a yearly service for a caravan won’t experience problems, but think about the unexpected problems that will happen less frequently, though. Some of our visitors choose to maintain their caravans themselves, while others do so yearly at a servicing facility.
To help you out, we are adding a link to Caravan DIY Tool with some items that will help you with Caravan Repairs.
Benefits of Doing Your Own Caravan Repairs
There are several benefits to doing your own caravan repairs. First and foremost, you’ll save money. Professional repairs can be expensive, and if you’re on a budget, it can be difficult to justify the cost. By doing the repairs yourself, you’ll only need to pay for the cost of materials and tools, which can be significantly less than the cost of hiring a professional.
In addition to saving money, doing your own caravan repairs can be a fun and rewarding experience. It gives you a sense of accomplishment to know that you fixed something yourself, and it can be a great way to learn new skills. Plus, the more repairs you do yourself, the more confident you’ll become in your abilities.
Finally, doing your own repairs can also save you time. When you hire a professional, you often have to work on their clock, and the repair can take longer than you anticipated. When you do the repairs yourself, you can work on your own schedule and complete the repair at your own pace.
Sometimes it’s best to Consult Professionals
No matter how much we want to save the cost of maintenance and perform the DIY chores ourselves, there are times when we should let the professional handle the situation best. for example, critical health and safety checks such as tyres, gas, and electricity checks. It is a tendency to ignore critical health and safety checks as they may seem a bit over the top and redundant however there are serious implications if and when something has to go wrong.
Basic Tools and Equipment for Small DIY Caravan Repairs
Before you start any repair, it’s important to have the right tools and equipment on hand. Here are some of the basic tools you’ll need for most caravan repairs:
– Screwdrivers
– Pliers
– Adjustable wrench
– Socket set
– Multimeter
– Wire cutters
– Electrical tape
– Silicone sealant
– Butyl/Duct tape
– Hammer
– Drill and drill bits
– Saw
You may also need some specialized tools depending on the specific repair you’re doing. For example, if you’re replacing a window, you’ll need a window installation tool. If you’re working on the plumbing, you may need a pipe cutter or a pipe wrench.
Servicing – Hitch Head On A Caravan 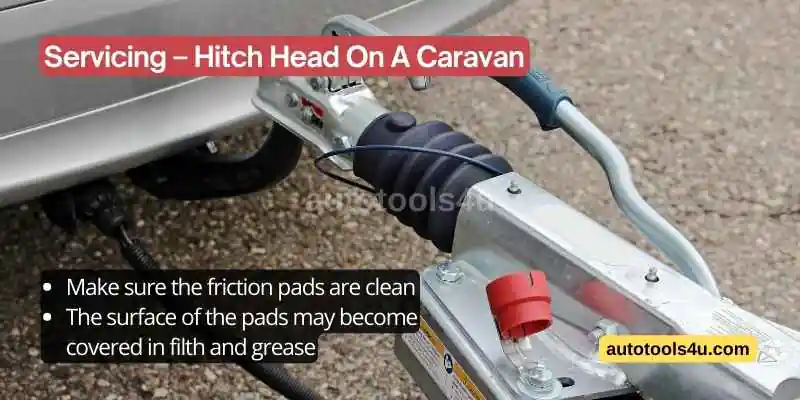
Caravan stabilizers come in a variety of styles. The AL-KO stabilizer hitch head shown is the hitch head most frequently seen attached. Consider a few things in order for the friction pads to function properly during maintenance on the caravan, such as:
- Make sure the friction pads are clean
- The surface of the pads may become covered in filth and grease.
- It can be reused rather than replaced if it still has enough depth.
- If a repair center is worried about the state of the pads anticipate a simple replacement.
Overhauling – Caravan Gas System For Leaks
You should consult experts in this area when it comes to the gas system on your trailer. A GasSafe-registered mobile caravan service company or a competent technician at a service center could handle this.
There are several processes involved in maintaining the caravan’s gas system, including:
- 1. An air pressure test will be performed first to check whether the gas system of the caravan can maintain pressure.
- If the pressure decreases, there is unquestionably a leak in the caravan’s gas system. For instance, you might need to replace the pigtail, the flexible hose that connects your LPG bottle to your caravan. Additionally, an outdated pigtail can cause problems with your caravan’s gas regulator.
- An instrument put into the flue will also be used by the mobile technician or caravan repair centre. This will evaluate the gas system’s capacity for combustion. The results of the test will show the levels of carbon monoxide generated. It resembles having your car’s MOT in many ways.
Moisture Meter Caravan Damp Test
Now that caravan servicing includes damp testing, you can perform it yourself using a caravan damp tester. There are, however, things to take into account.
- A mobile caravan technician or service facility will use professional-grade (expensive) damp testers, which are more accurate than the ones the average camper will buy.
Furthermore, a certified service center must perform the damp test if you want to keep your caravan’s guarantee intact. But I still believe it’s a good idea to conduct your own damp testing before taking your caravan in for its yearly maintenance.
Repairing Of Caravan Hand Brakes & Drums 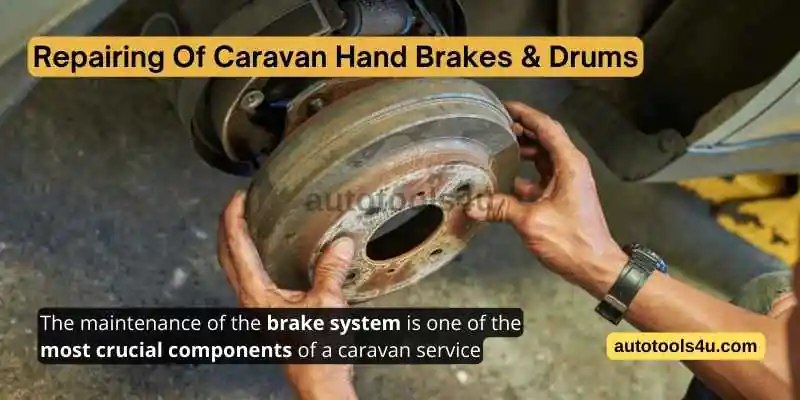
The maintenance of the brake system is one of the most crucial components of a caravan service. The caravan handbrake’s tension will be checked, and the brake drums will be removed to check the pads and other components. The condition of the caravan breakaway cable should also be checked.
I am aware that some of our visitors maintain the brakes on their caravans themselves. However, there are a few things you should think about before you decide to service the breaks on your caravan.
- Do you already have a compatible caravan jack? Incorrectly jacking up a caravan can be exceedingly risky and cause serious damage to the caravan.
- A caravan brake drum contains a number of springs and clips. If you misplace any of these parts, your caravan cannot be towed securely.
Note: The vehicle will therefore remain stranded until it is rectified. It is generally not advised to service the caravan’s brakes on your own.
A Visual Inspection OF RV Tyres at the Service Center
You won’t always have to wait around for your caravan to be serviced like you would for an MOT on your car. Usually, you’ll leave the caravan at the repair shop for at least a week. Therefore, a visual check will be conducted in a manner similar to that for renting a vehicle. Any flaws on the outside of the caravan will be noted by the service center. The owner is then requested to sign the inspection report with them. The keys and codes to any security systems you may have will also be sought after. such as a hitch lock or wheel lock for a caravan.
Most importantly, The service centre will carefully inspect the tyres after removing the wheels of the caravan. The tyre tread depth will be examined. However, this is not typically the cause for changing caravan tyres.
The sidewall of tyres will eventually break as the rubber ages and loses its malleability and flexibility. A caravan puts a significant amount of weight on a small number of wheels. This frequently causes problems like tyre flat patches and tyre wall cracking. The servicing centre will also verify that the wheels’ tyre pressure is appropriate. For caravans, there is no “one size fits all” recommended tyre pressure.
It depends on the caravan’s weight, number of axles, etc. An identical examination process will be used for the spare wheel. Additionally, the spare wheel carriage will be examined and lubricated to facilitate access.
Apply WD-40 Spray Or Inspect The Lock
Caravan locks can require some fiddling. I’ve had keys get stuck in front lockers before, and it took a lot of jiggling to get them out. Consequently, a service centre examined each of the exterior locks.
Can’t I complete this on my own? Of course, you can. Keep a small spray bottle of WD40 in the front or side locker of your caravan. It can be helpful for lots of problems but is especially helpful if you think the locks are acting strangely.
230v Electrical Test For A Caravan 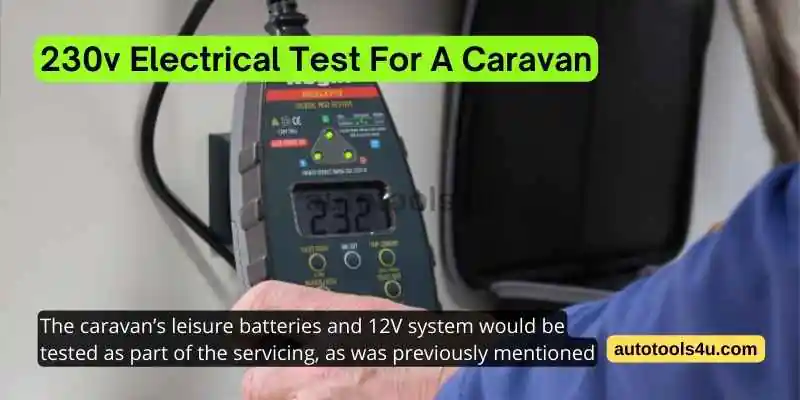
The caravan-batteries and 12V system would be tested as part of the servicing, as was previously mentioned. But we’ll now also evaluate the 230V mains electrical system. In the aforementioned video, the service center first uses a socket tester to check each of the caravan’s outlets.
Obviously, potholes on UK roads could cause a loose connection for a caravan traveling there. The positive, neutral, and earth connections of each socket can be evaluated with the socket tester. They are a handy small piece of equipment to have on hand, and I have one at home.
RCDs
The onboard RCDs are the second component of the 230V caravan electrical test that the service centre completes. They need specialized equipment to assess the sensitivity of the switches, so this is not a do-it-yourself project. It’s important to note that an RCD gets more susceptible to tripping the more it trips.
As a result, an RCD may require replacement because it is either excessively sensitive and trips frequently or it is insufficiently sensitive and poses a safety risk. In either case, replacing an RCD requires the services of an electrician.
Carbon Monoxide And Smoke Detectors 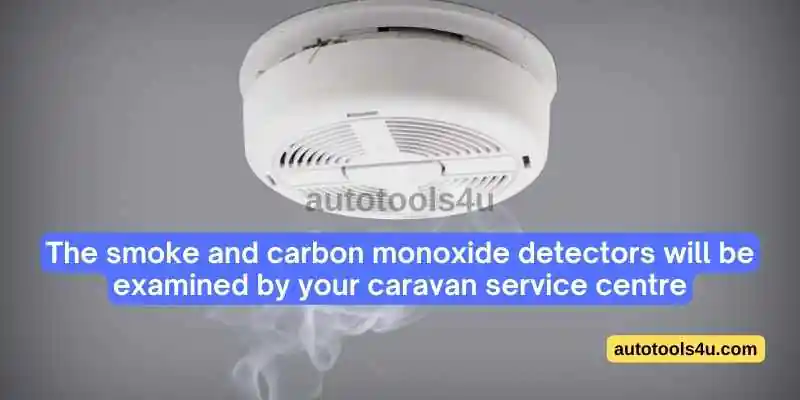
The smoke and carbon monoxide detectors will be examined by your caravan service centre. This is another DIY check to get into, just like the traffic lights. You ought to test them out before every caravan excursion. Additionally, it’s a good idea to have some extra batteries.
Water Systems And Sterilization For Caravans
In most cases, your caravan’s water system won’t be maintained. Therefore, you should ideally disinfect the water system before each trip in your caravan. You might occasionally encounter problems with the tap not working, but that problem won’t be looked into as part of a routine caravan service.
Additionally, it’s common practice not to inspect any problems with your Thetford toilet cassette. If you have a water filter installed in your caravan, you should also make sure that you carry a spare filter with you when you travel. Last but not least, you might need to replace the antifreeze if you have moist heating. Find out if the service centre in your area can handle this.
Common Caravan Repairs You Can Do Yourself
Fixing External Leaks
Leaks are a common problem with caravans, and they can be caused by a variety of issues, such as damaged seals or cracks in the roof. To fix a leak, you’ll need to first identify where it’s coming from. This may involve inspecting the roof, windows, and doors for any visible damage.
Once you’ve identified the source of the leak, you can begin to repair it. This may involve applying silicone sealant or butyl tape to the affected area. It’s important to make sure the area is dry and clean before applying any sealant or tape.
Replacing Windows
If your caravan’s windows are damaged or old, you may need to replace them. This is a relatively simple repair that can be done with a few basic tools. You’ll need to first remove the old window, which may involve removing screws or a trim piece. Once the old window is removed, you can install the new one using a window installation tool and butyl tape.
Repairing Plumbing Issues
If you’re experiencing minor issues with your caravan’s plumbing, such as a leaky faucet or a clogged drain, you may be able to fix them yourself. Start by identifying the source of the problem, which may involve inspecting the pipes and connections.
Final Thoughts
You might want to do a few parts of the caravan’s maintenance yourself. However, in order to correctly maintain the gas system, braking system, and 230V electrical system on your caravan, a specialist is absolutely necessary.
Whether you engage with a mobile repair technician or a specialist caravan service centre, be sure they are authorized to work on your caravan in accordance with the warranty terms.
Moreover, you should confirm which components of your caravan will and will not be inspected as part of the service. Some components of your trailer, such as the water system, may require your own servicing and maintenance. If you want to become a professional in Caravan repair, you can even join a course for the same.